Showing posts with label Birthday. Show all posts

Wednesday, 1 February 2012

How to Make a Castle Cake Tutorial - Part 2


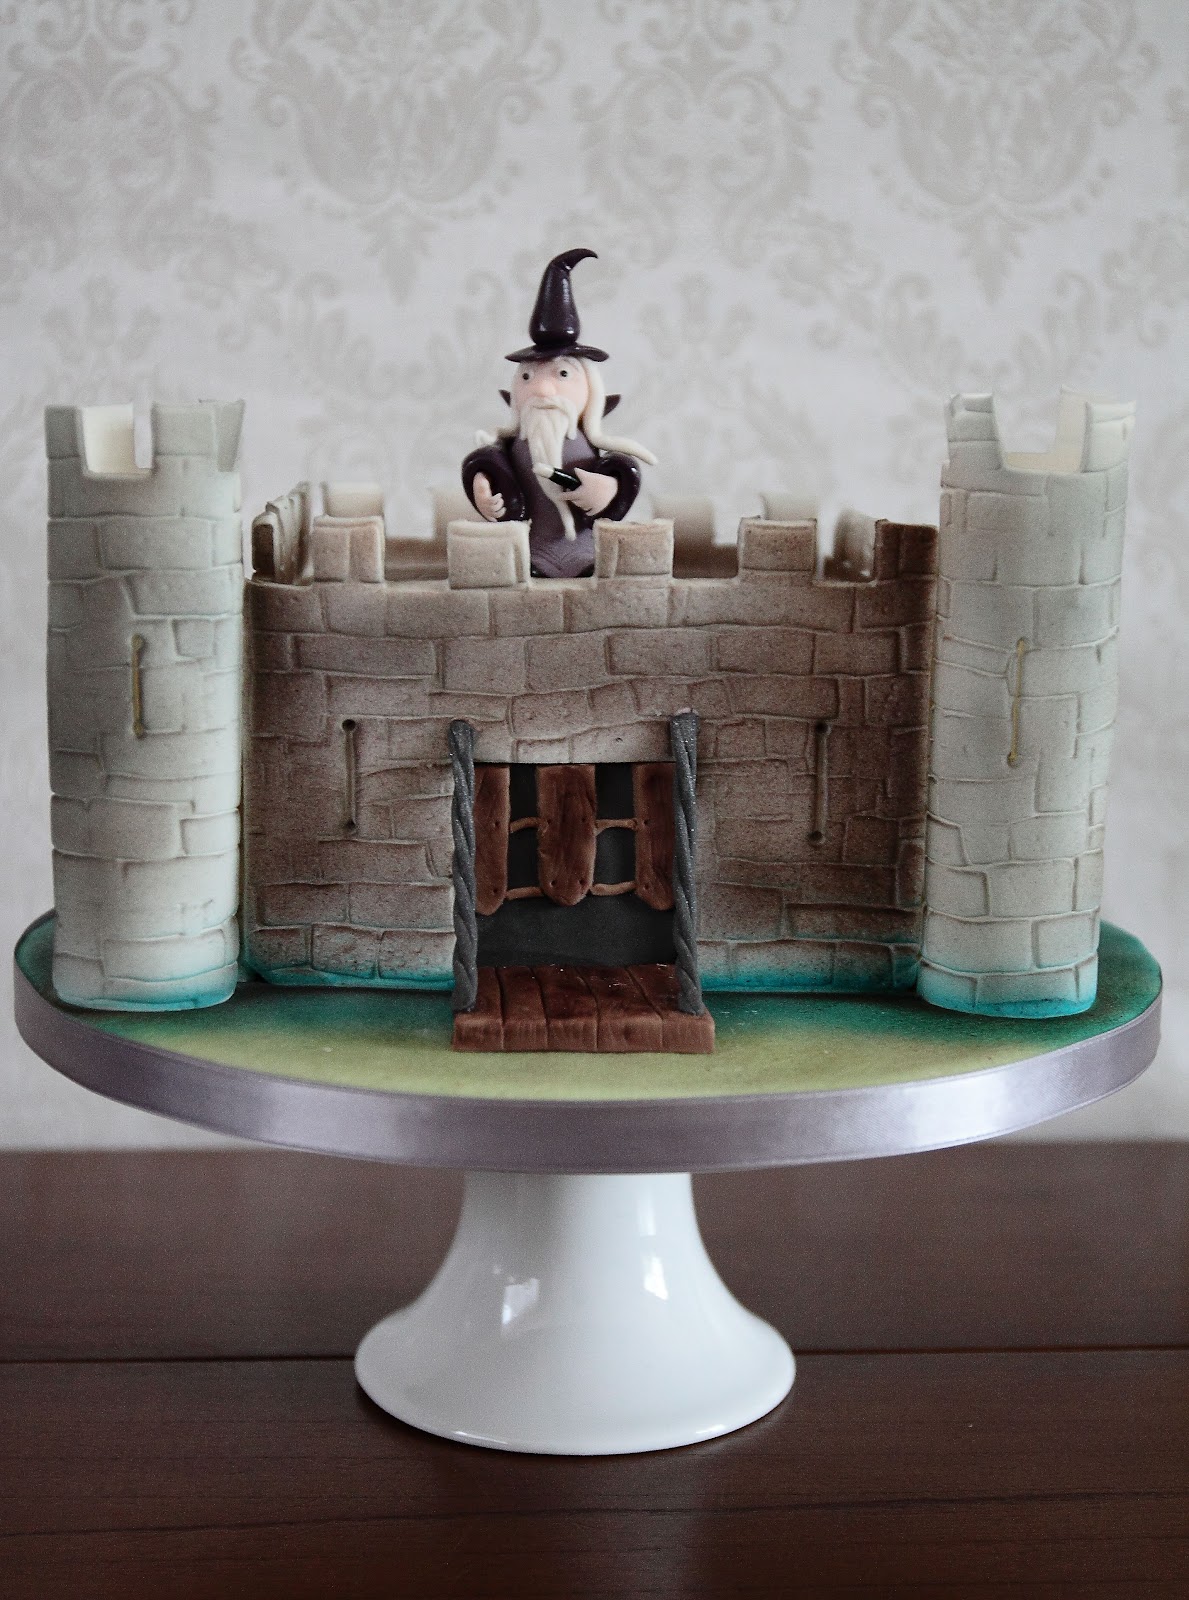
This is the second part of my tutorial on how to make the castle cake pictured above. For the first part please see here.

Previously we made the turrets, covered and coloured the board and placed the cake in position; so now it is time to make the walls. 

First, I rolled out a piece of fondant to the appropriate thickness (depends on how thick you like your icing on the cake) and cut it to the length of the side wall. The height was slightly taller than the height of the cake as I needed to allow for the battlements.


As with the turrets, I used the impression mat to give the look of a stone wall and I used a small square cutter to cut out the battlements. Then I cut in three arrow slits using the method described in part 1.


As the fondant is soft and it can be difficult to stop the shape distorting while handling it, I popped it into the freezer for a minute or two just to cool down and stiffen up. This allowed me to then put it in place without any stretching or distortion. You can use a very thin layer of buttercream, or jam or sugar glue to stick it in place; whatever is your preference.


I then put the roof in place - simply a square of fondant given the treatment with the impression mat. It is easier to put the roof on at the start rather than putting all the walls in place and then trying to put it in place.


I then added the second side wall. 


Next was the back wall. When I measured the fondant for this I took into account the fact that the side walls had been added, so it was a little wider.


The front wall of course needed to incorporate the drawbridge and portcullis, so I used a large square cutter to cut out the space in the middle of the wall. I put just two arrow slits on this wall, one either side.


Once the wall was in place on the front, I put the turrets in place and then used the airbrush to give it all some colour


I cut a thin piece of black fondant to put into the space at the front. Even though I used the same sized cutter as I had on wall, it still needed a bit of tidying up to make it fit neatly. The thinness of the black gave the illusion of the walls being thicker and that there was something inside the castle. I knew that I wanted to add a portcullis, so it meant there would be room for this without it standing proud of the walls.


Any visible icing sugar marks were easily removed by painting a little leaf glaze onto the affected area (you could use vodka or even water, very sparingly, to do the same thing).


Next was the drawbridge. I cut out a thick square of brown fondant, using the same sized cutter as above, and marked it up to look like it was made of planks of wood. 


It's the little details that always make the difference, so I always try to remember to put in things like nail marks etc. The colour of the fondant seemed a bit 'blocky' to me, given that the rest of the castle was airbrushed, so I used some brown dusting powder to give some texture and depth to the wood grain.


It slotted in to place perfectly. Just the right length to go over the moat and on to the grass :o)

Then it was just a case of adding some rope/chain to the drawbridge and the portcullis.


As the party was to have a magic theme, I decided that the castle needed a resident wizard. My next post will be a tutorial on how I made the wizard model that sat on top of the cake.

Until next time...

Monday, 30 January 2012

How to Make a Castle Cake Tutorial - Part 1

When I was asked to make my first ever castle cake last year, I consulted Mr Google to see what hints and tips he might have in the form of tutorials. I discovered a lot of Disney-style fairy tale princess type castles out there, using ice-cream cones as turrets, but nothing much in the style I had in mind. This first cake was a great learning experience and so when I was asked to do the castle cake for last week's party, I had a clear idea of what I was going to do and decided to take photos as I went along so I could post a tutorial.

So here is how I went about making this latest cake:


This first step can be done some days in advance. I rolled out a thick layer of gumpaste and cut it into a rectangular shape. 


As a 'template' for the turret I used the inner tube from a roll of gift paper (covered in clingfilm).  The width of the rectangle has to be sufficient to go around the tube with a slight overlap (or at least at the very minimum so that the two edges can abut). 


The length corresponds to the desired height for the turrets - I guesstimated the height of the baked and covered cake then added on enough that I thought would give me the proportions I was after. There's no hard and fast rule, just what you think will look good to your eyes.

I have the FMM cobblestone and stone wall impression mats, so I used the stone wall one to give texture to the gumpaste.


I then simply used a square cutter to make the battlements: 

Once this was done, it was 'simply' a case of wrapping the gumpaste around the tube, and


securing it with sugar glue:


The turret was sturdy enough to stand around the tube without sagging, which would mean that it could dry without part of the stone impression becoming flattened.


Before the gumpaste started to dry, I then put in the arrow slits by first cutting a vertical line


and then using the small end of the ball tool to put a circular indentation at each end.


I then used the sharp end of the dresden tool to open up the slit.


The turrets were left to dry for several days (the photo makes this one look wonky, but it wasn't).


Next job is to get the board ready for the cake. I covered it in sugarpaste and then used a new sponge to give it texture.


I then airbrushed the board. I wanted the castle to be mostly surrounded by moat with a small area of grass at the front for the drawbridge to go on to.


There was no need to airbrush right into the middle of the board since the cake would be sitting there.


Next time I will show you how I made this scrummy chocolate cake look like the castle in the picture at the start.

Wednesday, 27 July 2011

Emily's Octonauts Birthday Cake


My friend David was pleased enough with the Mr Tumble cake that he entrusted me with the task of making his daughter's birthday cake. She is a real fan of a cartoon called 'Octonauts'. My eldest son is also a keen fan of the show, so I was very familiar with the characters and instantly knew what the look of the cake should be like.                                                         


 I had a lot of fun making this one. The submarine (called 'Gup-A' as I am reliably informed by my son) is made out of 'rice krispie treats' and I managed to get a smooth surface for the fondant layer by giving it an undercoat of royal icing. The white and purple coral is made by piping royal icing onto dried grape stalks - this gives a really natural 'organic' look.

My son has now decided that he wants an Octonauts cake for his birthday next month,only he 'requires' both the Gup-A and Gup-B on his....along with many other enhancements! I think I'd better start modelling now...

Thanks to David for the wonderful photos!


Monday, 11 July 2011

Nanny's Birthday Rose Cake

Over the weekend we celebrated my Grandmother's 86th birthday. I thought I would try something a little different and decorate a cake with piped buttercream rather than fondant, and this is the result:


I think a couple of these stacked up would make a lovely, simple wedding cake.

.

Thursday, 7 July 2011

Mad Hatter 'Un-birthday' Cake


My friend's mum is organising a charity event this weekend with the theme of the Mad Hatter's Tea-party. She asked me if I could come up with an 'un-birthday' cake for the event. I had wanted to try a topsy-turvy cake for a while as they look such fun, but the problem was that they didn't need as much cake as would be required to make the cake work. So I experimented a bit and managed to make the top two tiers from cake dummies and 'rice krispie treats'. I found covering the dummies quite difficult as the rice krispies don't make for the smoothest of surfaces, but I am pleased with the Cheshire Cat...he turned out just as I'd planned in my head.

These wonky cakes seem to be becoming quite popular as wedding cakes, although perhaps not with the Mad-Hatter theme!


.