Monday 30 January 2012

How to Make a Castle Cake Tutorial - Part 1

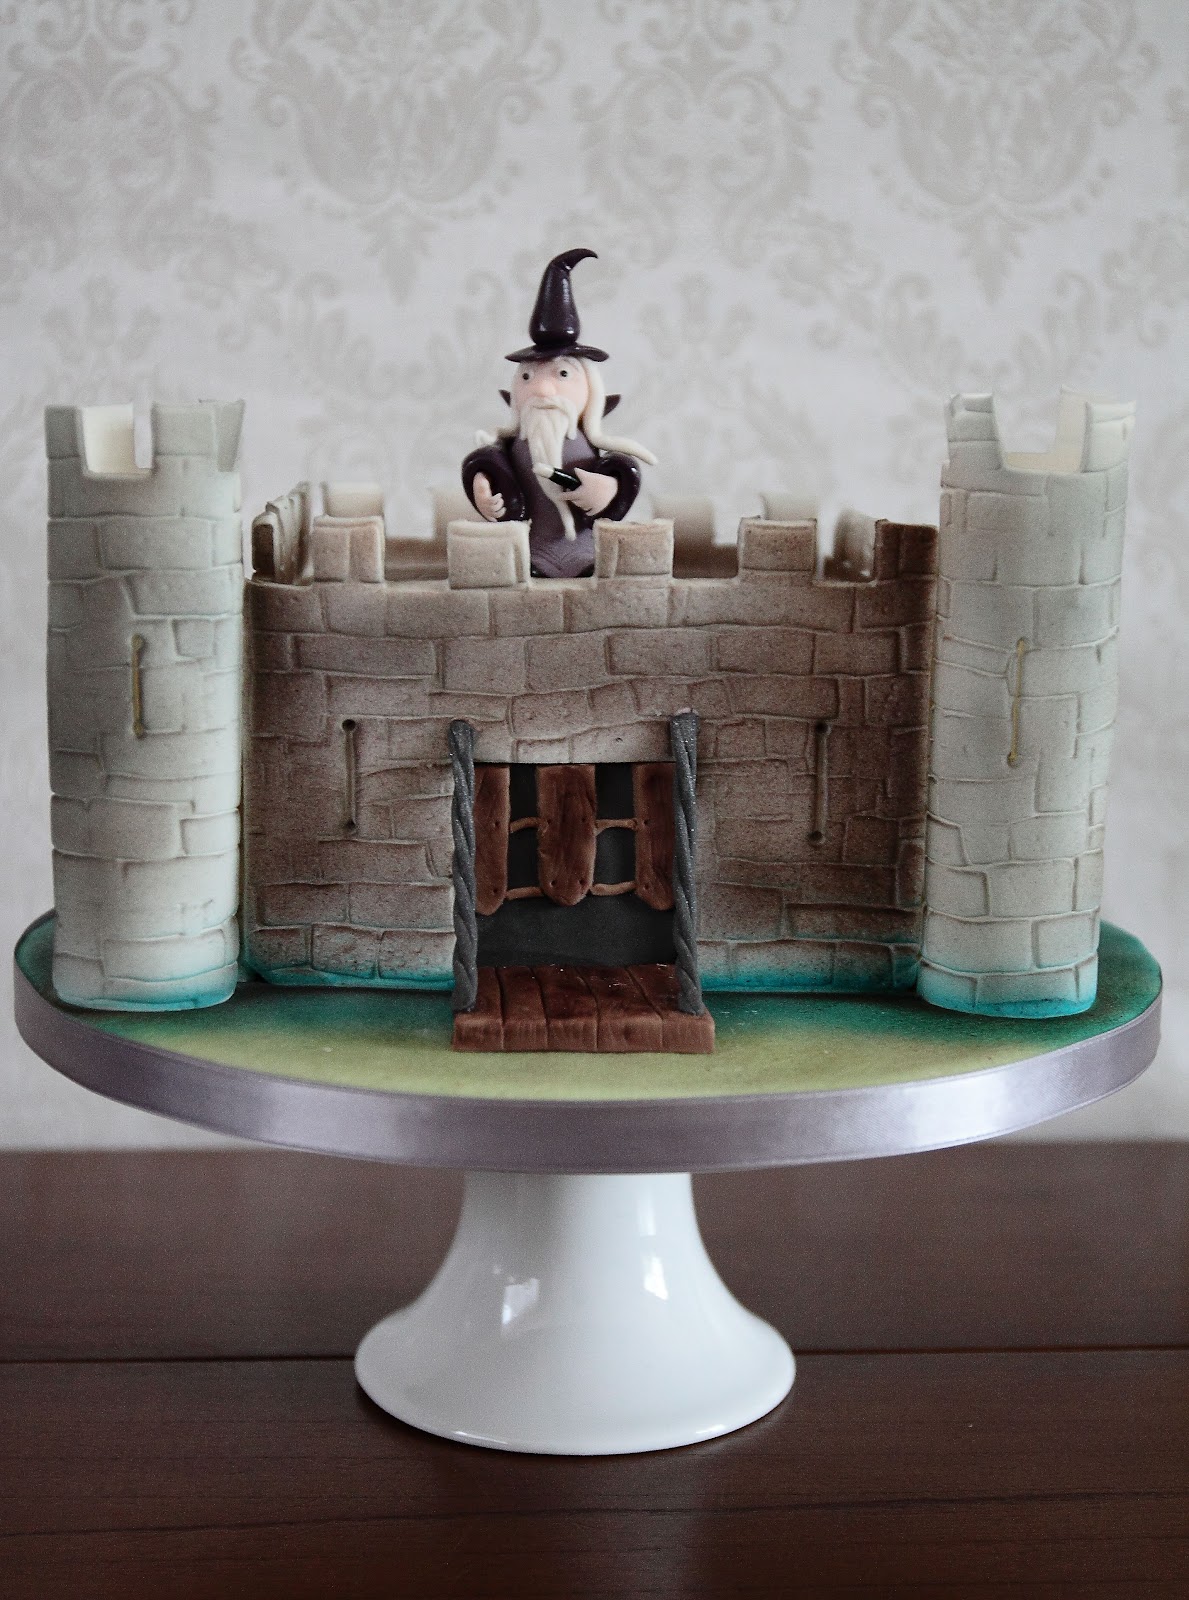
When I was asked to make my first ever castle cake last year, I consulted Mr Google to see what hints and tips he might have in the form of tutorials. I discovered a lot of Disney-style fairy tale princess type castles out there, using ice-cream cones as turrets, but nothing much in the style I had in mind. This first cake was a great learning experience and so when I was asked to do the castle cake for last week's party, I had a clear idea of what I was going to do and decided to take photos as I went along so I could post a tutorial.

So here is how I went about making this latest cake:


This first step can be done some days in advance. I rolled out a thick layer of gumpaste and cut it into a rectangular shape. 


As a 'template' for the turret I used the inner tube from a roll of gift paper (covered in clingfilm).  The width of the rectangle has to be sufficient to go around the tube with a slight overlap (or at least at the very minimum so that the two edges can abut). 


The length corresponds to the desired height for the turrets - I guesstimated the height of the baked and covered cake then added on enough that I thought would give me the proportions I was after. There's no hard and fast rule, just what you think will look good to your eyes.

I have the FMM cobblestone and stone wall impression mats, so I used the stone wall one to give texture to the gumpaste.


I then simply used a square cutter to make the battlements: 

Once this was done, it was 'simply' a case of wrapping the gumpaste around the tube, and


securing it with sugar glue:


The turret was sturdy enough to stand around the tube without sagging, which would mean that it could dry without part of the stone impression becoming flattened.


Before the gumpaste started to dry, I then put in the arrow slits by first cutting a vertical line


and then using the small end of the ball tool to put a circular indentation at each end.


I then used the sharp end of the dresden tool to open up the slit.


The turrets were left to dry for several days (the photo makes this one look wonky, but it wasn't).


Next job is to get the board ready for the cake. I covered it in sugarpaste and then used a new sponge to give it texture.


I then airbrushed the board. I wanted the castle to be mostly surrounded by moat with a small area of grass at the front for the drawbridge to go on to.


There was no need to airbrush right into the middle of the board since the cake would be sitting there.


Next time I will show you how I made this scrummy chocolate cake look like the castle in the picture at the start.

Wednesday 25 January 2012

Black & White Cake with a Hint of Purple


This was a very last minute leaving cake for some friends who were leaving the area to start new jobs. As I had free reign with the design, I decided on a different, more simplified, take on a black and white cake. I think the little splash of purple sets it off perfectly - how about you?

Monday 23 January 2012

It May Not Be Manolo Blahnik, But Carrie Bradshaw Would Love This!


Looking back over some of the cakes that I really enjoyed making last year, this one really stands out in my mind. It was for an 18th birthday party and the remit was a black & white cake. The invitations for the party featured a fabulous platform stiletto shoe and so I decided to incorporate this into the design.


This cake represented a lot of firsts for me - the first time I had made a gumpaste shoe and the first time I had tried stencilling royal icing on to a cake. It was nerve-wracking to be using black royal icing on a first attempt at the stencilling as if I made a mistake there was no where to go with it....the white icing underneath is ruthlessly unforgiving. 

Despite never having made one before, the shoe turned out to be relatively straightforward. I was so pleased with the finish that the red glitter gave to it. The photographs don't do any justice to just how sparkly it was. It set the cake off beautifully and, to be honest, there was a part of me that didn't want to let this one go. I am glad that I wasn't there to see it cut! 


Saturday 21 January 2012

Sweetness & Hearts


So here's what I did with some of those scrummy biscuits I posted about last time. I really had fun doing these and am really please with how the hearts came out. However, I wasn't happy with the finish of the icing itself, so it's back to the drawing board on that front! Despite this disappointment, however, I was more than happy with the taste (of course I had to try them!) and they went down well at a networking meeting I took them along to this week. I shall definitely be trying these again!

Thursday 19 January 2012

Something New for the New Year

For some time now I have been admiring the work of Sugarbelle and  when, back in November, she posted a tutorial on Baking the Perfect Sugar Cookie I promised myself that I would give it a go. She produces the most amazing tutorials on her blog and makes the art of iced biscuits look achievable even for a complete novice like me.


So here we have a stack of biscuits made to her delicious recipe & just waiting to be decorated. Watch this space for how I get on!

Tuesday 17 January 2012

A New Year - Looking Forwards & Reflections

I can hardly believe that the last time I posted something to my sadly neglected blog it was last September. The time has flown by since then. There are never enough ours in the day and I have to admit to maintaining my facebook page (canterburycakes) in priority to my poor little blog, but my new year's resolution is to split my time evenly between them both...all good intentions!


2012 promises to be an exciting year on the cake front, as I have (slightly) more time to dedicate to learning the craft since finishing full-time work (although looking after the little people in the house is a full-time job in itself!). I have a workshop booked with the amazingly talented Lorraine McKay (which I am SO excited about), tickets booked for the Cake International show which is taking place in London and a place reserved on the British Sugarcraft Guild's skills school. I am also hoping to fit in a second professional diploma course in either royal icing or sugarpaste to compliment the one that I did last year in sugar flowers. So, hopefully I should have plenty to report back here.


2011 was an amazing year on the cake front. Given that the official start date of my business was 1st September I have had an amazing response and been kept quite busy. I have even had to turn work down because I just couldn't fit it in, which I really didn't imagine would happen so soon. I have worked on some extremely enjoyable projects which have allowed me to explore my creativity while honing my skills (often working out of my comfort zone - the best way to improve one's skills I find!). So, for my next few posts I will look back at, and share with you, some of my favourite cakes of 2011.


Lets start with this one


A good friend of mine, and her twin sister, celebrated their 40th birthday at the end of the year. I offered to make them a birthday cake as my gift to them and I was given free reign on the design. Earlier in the year I had made this cake inspired by the style of Cath Kidston:


and I really liked the idea of doing a similar cake but (hopefully) improved with the benefit of all I had learnt during the course of the year. The flowers were a joy to make and I think they finished the cake off perfectly.